Swing/RandomDissolve のバックアップ(No.2)
- バックアップ一覧
- 差分 を表示
- 現在との差分 を表示
- 現在との差分 - Visual を表示
- ソース を表示
- Swing/RandomDissolve へ行く。
- 1 (2007-10-21 (日) 04:27:13)
- 2 (2012-08-03 (金) 16:13:53)
- 3 (2013-08-27 (火) 18:03:28)
- 4 (2014-11-22 (土) 03:59:58)
- 5 (2014-11-25 (火) 03:03:31)
- 6 (2015-01-13 (火) 11:27:57)
- 7 (2016-02-10 (水) 23:49:33)
- 8 (2016-09-15 (木) 16:33:36)
- 9 (2017-10-27 (金) 13:34:01)
- 10 (2019-05-21 (火) 14:52:55)
- 11 (2021-02-16 (火) 17:06:14)
- 12 (2024-01-17 (水) 11:24:40)
- 13 (2024-05-19 (日) 06:07:42)
- 14 (2024-06-13 (木) 19:33:26)
- 15 (2025-01-03 (金) 08:57:02)
- 16 (2025-01-03 (金) 09:01:23)
- 17 (2025-01-03 (金) 09:02:38)
- 18 (2025-01-03 (金) 09:03:21)
- 19 (2025-01-03 (金) 09:04:02)
- 20 (2025-06-19 (木) 12:41:37)
- 21 (2025-06-19 (木) 12:43:47)
TITLE:RandomDissolveで表示を切り替え
Posted by aterai at 2007-03-26
RandomDissolveで表示を切り替え
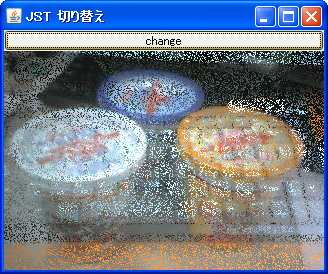
RandomDissolve効果で表示する画像を切り替えます。このサンプルは、Java 2D - random pixelwise fading ?に投稿されているソースコードを参考にしています。
- &jnlp;
- &jar;
- &zip;
サンプルコード
class RandomDissolve extends JComponent implements ActionListener {
  private final javax.swing.Timer animator;
  private final BufferedImage image1;
  private final BufferedImage image2;
  private BufferedImage srcimg, dstimg;
  private boolean mode = true;
  private int currentStage;
  private int[] src, dst, step;
  public RandomDissolve(BufferedImage i1, BufferedImage i2) {
    this.image1 = i1;
    this.image2 = i2;
    this.srcimg = copyImage(mode?image2:image1);
    animator = new javax.swing.Timer(10, this);
  }
  public boolean nextStage() {
    if(currentStage > 0) {
      currentStage = currentStage - 1;
      for(int i=0; i<step.length; i++) {
        if(step[i]==currentStage) src[i] = dst[i];
      }
      return true;
    }else{
      return false;
    }
  }
  private BufferedImage copyImage(final BufferedImage image) {
    int w = image.getWidth();
    int h = image.getHeight();
    BufferedImage result = new BufferedImage(w, h, BufferedImage.TYPE_INT_RGB);
    Graphics2D g = result.createGraphics();
    g.drawRenderedImage(image, null);
    g.dispose();
    return result;
  }
  private int[] getData(BufferedImage image) {
    WritableRaster wr = image.getRaster();
    DataBufferInt dbi = (DataBufferInt)wr.getDataBuffer();
    return dbi.getData();
    //return ((DataBufferInt)(image.getRaster().getDataBuffer())).getData();
  }
  private static final int STAGES = 16;
  public void animationStart() {
    currentStage = STAGES;
    dstimg = copyImage(mode?image1:image2);
    srcimg = copyImage(mode?image2:image1);
    src  = getData(srcimg);
    dst  = getData(dstimg);
    step   = new int[src.length];
    mode   = !mode;
    Random rnd = new Random();
    for(int i=0;i<step.length;i++) {
      step[i] = rnd.nextInt(currentStage);
    }
    animator.start();
  }
  public void paintComponent(Graphics g) {
    super.paintComponent(g);
    Graphics2D g2d = (Graphics2D)g;
    g2d.setPaint(getBackground());
    g2d.fillRect(0, 0, getWidth(), getHeight());
    g2d.drawImage(srcimg, 0, 0, srcimg.getWidth(), srcimg.getHeight(), this);
  }
  public void actionPerformed(ActionEvent e) {
    if(nextStage()) {
      repaint();
    }else{
      animator.stop();
    }
  }
}
解説
上記のサンプルでは、BufferedImageからWritableRasterを取得し、元画像と次の画像のコピーから、int配列をそれぞれ用意しています。元画像の配列を次の画像のピクセルでランダムに置き換えて、これを再描画することで画像の切り替えを行っています。
